|
Topic: |
Automotive
Photography 5: Locations |
|
Author/Copyright: |
John Jovic |
The backdrop or setting in any
automotive image is integral to it's success or failure. Finding
suitable locations is an important part of car photography, and possibly
also the hardest part.
Choosing a location should ideally start at the concept stage when
deciding how to shoot the car. If a particular look, feel or style of
image is planned then that may dictate the location required.
Alternatively a car may be immoveable so the location will have been
dictated for you, like it or not.
The colour of the car itself
will always be a factor in location selection too.
 |
|
 |
|
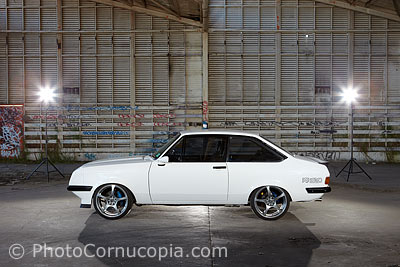
Shooting indoors can be an advantage because it
might allow you to light the car any way you want, but can also pose
all kinds of problems. In this case the overhead skylights in the
roof of the building where often reflecting in the car so it was
difficult to position the car to hide these reflections. White or
light coloured car panels don't reflect as much of their surrounds
as any dark colours would. Such a location would be a poor choice
for a black or dark coloured car because the reflections in the
panels would have been overly distracting and because strobes are
less effective on dark colours. |
|
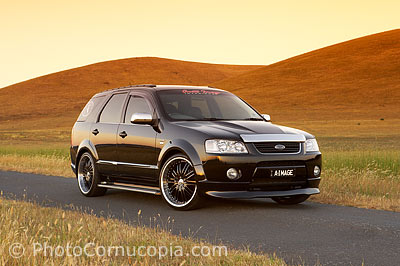
Cars are mirrors, especially black cars. The clean
reflection of the horizon in the side of the car is due to the lack
of trees, power poles and buildings anywhere near the car. Such
locations are ideal for dark coloured cars. The shape of the car
will also determine how much it reflects it surroundings. |
Black cars are like mirrors and reflect everything around them,
including the photographer. Any dark colour will be far more reflective
than a light colour. Black cars are easier to photograph in open
locations where there is relatively little that can be reflected in the
panels. Light colours are less likely to reflect their surrounds in
their panels so are more forgiving than any dark colours. Light colours
are generally easier to photograph in otherwise difficult or cluttered
locations simply because they are less likely to reflect their
surroundings.
The colour of the car may also determine which lighting techniques may
or may not be used and this may have a flow on effect to location
selection. Dark colours do not respond well to strobes but they do
respond well to light painting techniques, and soft ambient light like
sunrise/sunset, so these factors need to be considered when choosing the
location. Light colours are much easier to light with strobes or other
lighting techniques, such as light painting, so allow greater
flexibility in location selection.
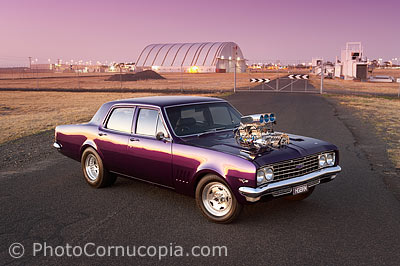
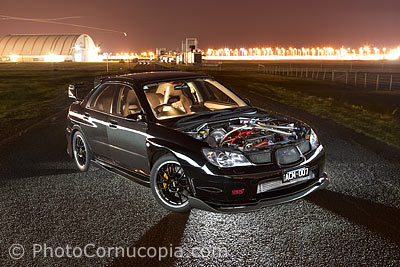
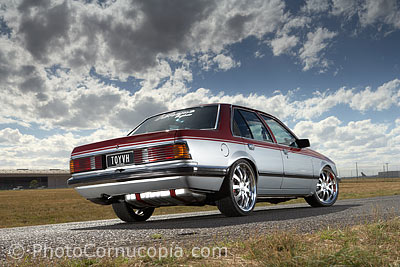
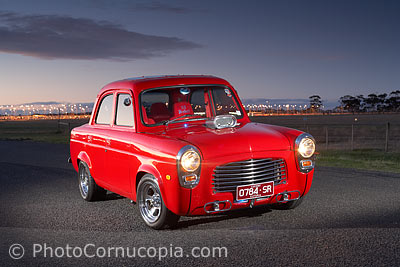
The 4 images above simply
illustrate that you can often use the same location in a variety of ways
to achieve a different style or look by shooting at different times of
the day, using different lighting techniques and angles.
Some locations may work well
for one single image or angle only, and this might be all you want, but
other times a location which allows you to move around and compose the
image in various ways may be far preferable.
Location Do's and Don'ts
The table below lists some tips for finding and using locations.
|
Do |
- Look for road surfaces that the
car would be expected to be driven upon, ie concrete/bitumen for
road, race, drag and drift cars. Gravel is acceptable for road cars
but dirt roads and grass should be avoided. If the vehicle is an
off-road vehicle such as a 4 wheel drive then any surface would
potentially be suitable, even creek/river beds, rocks etc.
- Consider the time of day the shoot
will take place and how the sun will help or hinder the shoot. Some
locations work only in the morning, others only in the afternoon.
Overcast sky's eliminate all shadows so may allow the use of certain
locations which may not have been possible on a sunny day.
- Consider the time of year and the
and how the sun will help or
hinder the shoot. Some locations may only be suitable during certain
periods of the year when the sun rises or sets in the appropriate
part of the sky. Know where the sun rises and sets at the extremes
of summer and winter so that you can accurately judge where the sun
will be at any time of the year.
- Some locations are
too busy to be used except during
short windows of opportunity such as Christmas holidays or breaks.
- Make sure that road access to the
actual location is reasonable and that the vehicle being
photographed can actually get there, ie avoid steep drive ways
(which very low cars may not be
able to pass) or dusty dirt roads which the owner may not be willing
to drive on.
- If shooting on private property
then make arrangements with the party responsible for the property
for permission to shoot.
- Be opportunistic and take
advantage of opportunities that present themselves because you might
not have another chance. If you happen along a great location and
keep it up your sleeve waiting for the right car to come along then
it is more than likely that the location will change or be lost
before you get a chance to use it. Some locations may remain
unchanged and available year after year but the vast majority of
locations come and go very quickly.
- Always ask the owner of the
vehicle if they have any special access to interesting locations.
This often leads to the most interesting or otherwise inaccessible
locations.
- Make the most of a location by
using it at different times of the day or using different lighting
techniques to achieve a different look.
- Respect the property owners and
their neighbors.
|
|
Don't |
- Don't shoot cars on grass,
- Again, don't shoot cars on
grass,
- Don't enter property illegally.
- Don't do burnouts or leave unsightly tyre marks.
- Don't leave any rubbish behind.
- Don't identify local businesses unless it is part
of the concept of the shoot.
- Don't do anything to give the property owners
reason to avoid any future automotive photo shoots because this
spoils it for everyone.
- Don't advertise locations to one and all. Keep
good locations close to your chest to protect them from being abused
and over used.
- Avoid shopping centre's, car parks and similar
private property unless you have permission to be there.
|
How to find locations
The next step is to try to find the location which is always easier said
than done. There is no substitute for simply being on the lookout for
locations all the time, on your way to work, driving around to a friends
house or to a movie. Always look out for interesting places and keep
notes about them for future reference. It's also a good idea to take
lots of pictures of potential locations and keep these with your notes.
Keep in mind that cars are mirrors and will reflect everything around
them so a location with lots of trees, power poles, signs etc will
potentially cause unwanted reflections in the cars panels. Sometimes a
clean reflection of the horizon is needed in the panels of the car, such
as when photographing black or dark cars. Some of the 'cleanest'
locations are along the sea (where the horizon along the sea can be
reflected in the cars panels) or open areas, such as in the country or
desert where there are no objects along the horizon to create unwanted
reflections.
When location scouting it's often a good idea to actively go to places
or areas that you may not be familiar with or that you might even think
to be a poor candidate for potential locations. Some times these
unfamiliar places can lead to the most interesting and even abundant
locations. Most urban areas are constantly changing so new locations are
constantly becoming available. At the same time old ones are lost so
it's important to always be on the look out and have new places to
shoot.
It's always a good idea to allow some time to scout for locations before
the shoot itself. Locations change quickly so it's always best to double
check a location before a shoot and allow enough time to find a new one
if needed.
 |
|
 |
|
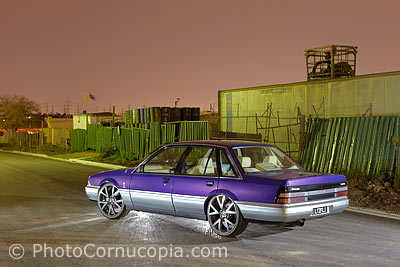
Shooting at night has
it's difficulties but also has several advantages. 1/ much less
traffic if any (this car is stopped in the middle of a road). 2/ the
weather, sky, and direction of the sun are irrelevant so there is
greater freedom to light the car, although street lights can be a
problem. 3/ it allows a different look compared to shooting in
daylight. |
|
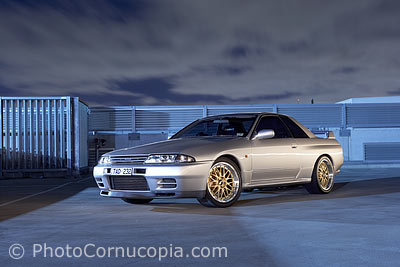
This location was
effectively changed simply by using coloured gels. This lighting
effect was achieved in camera by using coloured gels on the lights
used to paint the car with light. The purpose was to change the
colour of the background or ambient light which came from commonly
used Metal Halide (white/green) and Sodium Vapour (orange) street
lighting. |
Some people like to use
Google Maps with Street View to get an idea of what an area looks like
before actually going there but this is only useful as a guide.


