What is Painting
with Light?
The term 'painting
with light' or 'light painting' describes a range of techniques used
to light a subject during a long exposures and is an excellent lighting
technique for car photography. Painting with light doesn't
describe any specific look or even equipment, it's just a
technique. However cars are reflective by nature so the reflection
of the light source can be a give away that lightpainting was used. The basic concept of painting with light is that you
photograph a subject in a dark environment and you apply light to
various parts of the subject as if you where applying it with a
paint brush, hence the term 'Painting with Light'. It's often done
in a single exposure long enough to be able to gradually light the
entire subject however it's also common to shoot a series of
exposures lighting various parts of the subject which are later
combined into a single image.
 |
|
 |
|
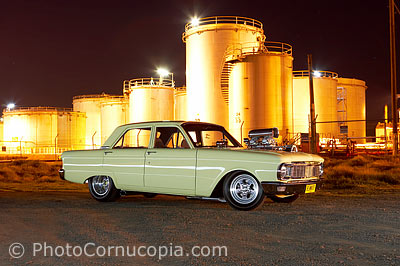
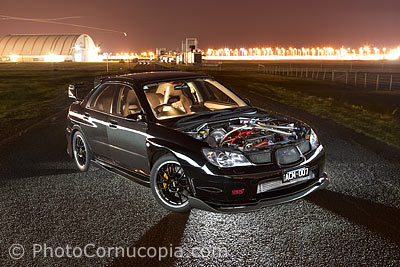
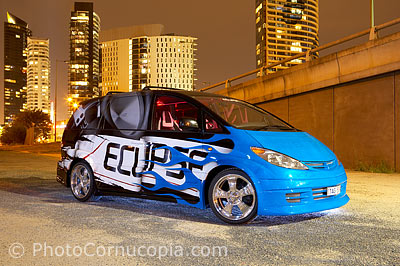
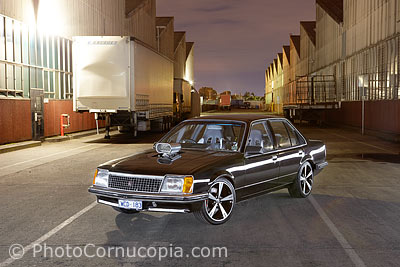
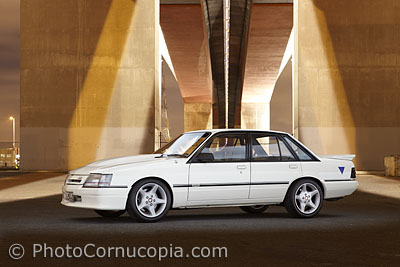
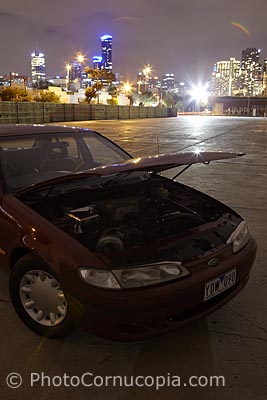
This is a typical example of Painting with Light.
This is a single exposure, not a composite, where the car was lit with a continuous
light source during an exposure long enough to light the background
with the ambient light. |
|
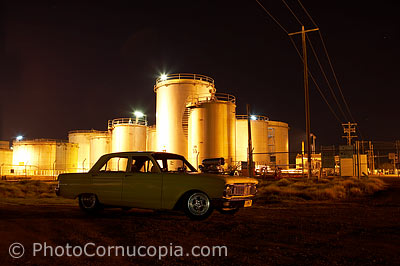
In this
example the car was lightpainted whilst walking around the car to
create the highlights on the windscreen and roof. This is a
composite image. |
The term painting with light
is also used to describe a technique where patterns are created, drawn
or painted in a dark environment, using flames, torches, sparklers etc.
This is not a lighting technique as such because the light itself is the
actual subject in the form of shapes, words, symbols etc left as trails
of light. This is not the same as the technique used to light a car
because it's end purpose is the light itself rather than a source of
illumination for a subject (a car).
How do you paint with light?
The examples below will hopefully show how the technique is employed
for car photography. As with most car photography it all starts with
finding a suitable location. The location for light painting needs
to be one where there is minimal stray light falling on the car
itself, but one where the background itself is interesting and can
be exposed in a period long enough to allow you to paint the car
with light. Extremely bright or dark locations are not very useful.
A very bright location (background) may force you to use a short
exposure which may not allow you enough time to light paint the
subject. Such a location may still work but might force you to
combine several exposures, with various parts of the car having been
lit, into one final image. A location which is too dark may simply
force you to use a very long exposure for the background itself.
Opening the lens to shorten an exposure is not always a good
solution because it reduces depth of field which may render parts of
the car slightly out of focus.
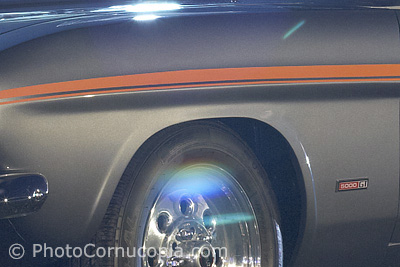
The strip of light reflected in the panels of the
car below are typical of the light painting technique when applied
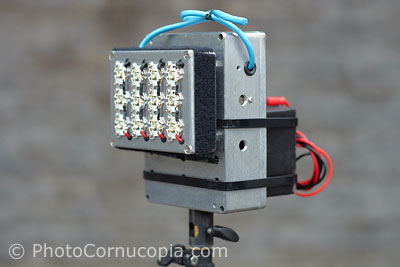
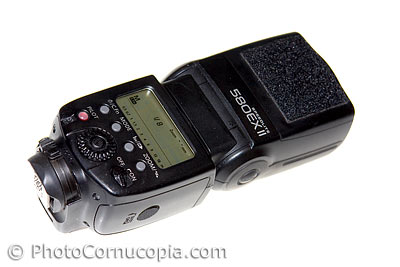
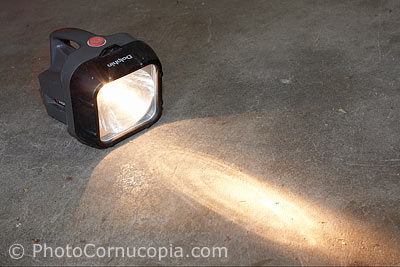
to cars. Painting with light can be done with a range of light
sources from candles, tungsten or LED (Light Emitting
Diode) torches, fluorescent lights to flashes/strobes. The size,
shape, colour and intensity of the light are all factors which can
be used to alter the lighting effect so conscious choices need to be
made by the photographer to achieve the desired or previsualised
effect.
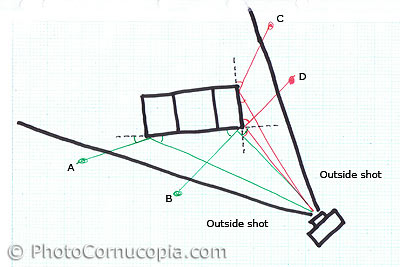
When you are light painting
during an exposure, in an otherwise dark environment, light
builds up in the image (on the cameras digital sensor or film) where ever you
light the subject and the
subject stays dark where none is added. If you are using a continuous
light source to paint with then you will need a relatively long exposure
to give you enough time to paint the subject with light, either by
walking around the subject within the image or from outside the shot as
seen by the camera. If
there is too much ambient light then you might be forced to use a short
exposure to reduce the ambient lights effect on the image. It's usually
best to use these techniques where it's relatively dark so that you can
achieve a long exposure. This is also a good reason to use a relatively
powerful light because it allows you to use a smaller aperture on your
lens which in turn allows you to use a longer exposure. Very weak lights
are potentially fine too but need a dark environment, possibly a
workshop, warehouse, studio etc. and longer exposures.
If you are in a dark environment,
with relatively dark clothes and without lights upon you then
you can walk through the shot as it is being exposed without
actually appearing in the image. As long as you don't spend too much time in one
spot and keep light from spilling onto yourself then you won't appear in
the image. You do need to be careful when walking between the subject
and camera as any light spilling from the back of the light source will
be visible in the image (which is not a problem anyway as long as any
stray light streaks are not on the car itself). You can use your body as a shield between the
light source and the camera and try to shield the light from the lens whenever
possible to reduce the chance of lens flare.
 |
|
|
|
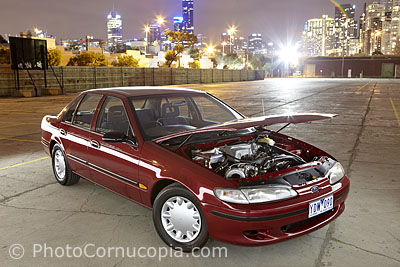
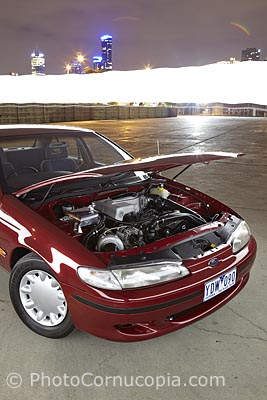
This image is a composite of the 2 images below.
Compositing images is not necessarily integral to
light painting but it's some times the only way to
achieve a desired effect, such as the lighting on
the bonnet, windscreen, roof and boot of the car. |
|
|
 |
|
 |
|
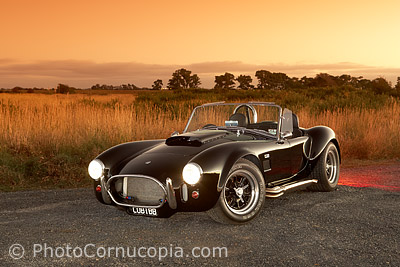
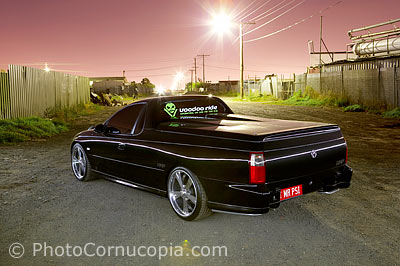
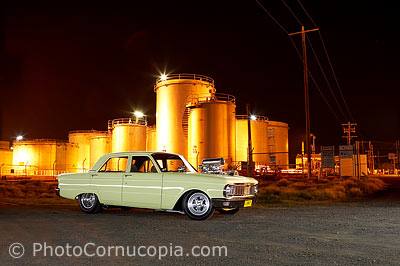
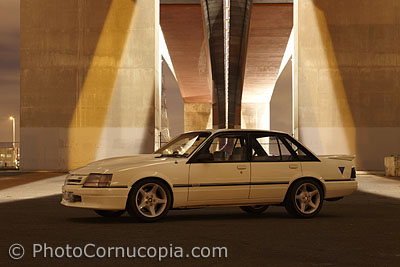
This images was the basis of the
composited image above. It was exposed for the background
and light painted so that it was fully lit from it's
side and grille during the exposure. This is a
straight RAW conversion and a complete and finished
image in itself. |
|
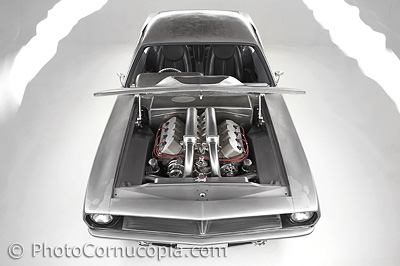
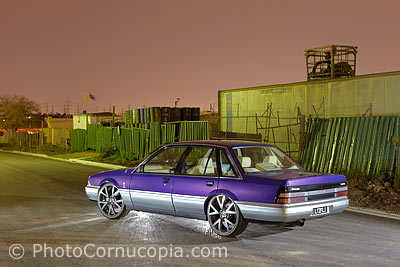
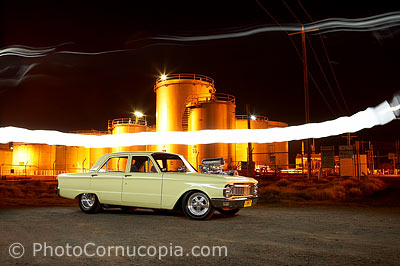
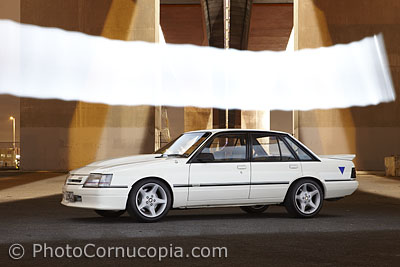
Here the car was light
painted with a continuous light source during a relatively long
exposure. The white streak above the car is the trail left by the light
whilst walking completely around the car during the exposure. Walking
behind the car leaves the reflections of the light
in the windscreen, bonnet, boot and roof but also
leaves the light trail which needs to be removed.
The reflections of the light in the cars panels were
not as clean in this image as in the previous image
(because the light was held much higher so the
reflections were in a different part of the cars
panels) so they were not used in the final image.
|
Light
painting is a variable technique where 5 different exposures can give you
5 different results because you may not have walked in the exact same
place, held the light at the same height or at the same speed.
Variations in the effect are easily achieved by varying any of
these or the light source itself. A small or point light source
is easier to hide in a cars reflection than a large light source
(because you don't necessarily want to see the lights reflection
in a cars panels). Conversely a large light source, such as a
large soft box or fluorescent tube, will create a larger strip
of light reflected in a cars panels so this would be a better
choice if that is the effect that's desired. You also might want
a very weak reflection in a car so a larger but weaker light
source might deliver the desired result.
You can also composite
several images where only parts of the subject are lit. This is
something you might do if you were lighting the subject with flash in
bright sunlight (or in the dark) and you lit different parts of the
subject in different images. These could then be composited into a
single final image.
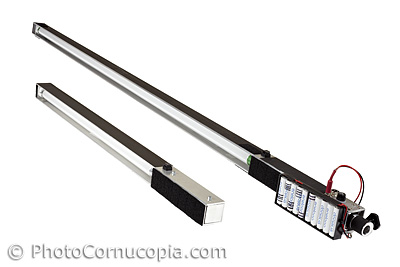
This is an
example using a 36W (4 foot) battery operated fluorescent light:
 |
|
|
|
This is image is a
composite of the images below. |
|
|
 |
|
 |
|
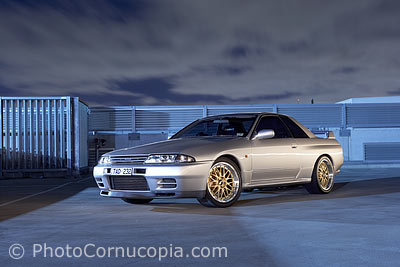
The background image (without any light painting) was processed at the same
colour temperature as the light painted image. |
|
In this example a 6500K
fluorescent tube was used with the
intention to make the Sodium (yellow/amber) street
lights as yellow/amber as possible for maximum contrast with the white car.
|
This is another example with
an 18W (2 foot) battery operated fluorescent light.
 |
|
 |
|
 |
|
This image
is a composite of the two images to the right. |
|
This background image was processed at the same
colour temperature as the light painted image.
|
|
In this example a 4000K tube was used and it
seemed to balance quite well with the Sodium (yellow/amber) street
lights.
|
Light sources
As mentioned previously,
any number of light sources could be used for light painting. A few are
described below.
The advantage of using a
powerful and controllable light whilst light painting is that you can use a smaller f
stop on the lens which then allows you to extend the exposure time
without over powering the image by any ambient light sources. If the
light used for light painting was relatively weak then you might
have to use a wider aperture which would force you to use much
shorter exposures before the ambient light adversely affected the
light painting.
Equipment, Tripods, Cable
Releases and Filters
Image sharpness is affected by many factors including the movement of
the camera during the exposure. Painting with light (at night) generally
involves a long exposure, or several of them which are later combined.
It's important to use rigid tripod during long exposures as this will
keep the camera and lens as still as possible which will help in at
least 2 ways. Firstly it will improve image sharpness by minimising or
eliminating any camera shake. Secondly it will help to keep multiple
images as similar as possible which helps to combine the images, if
desired. A flimsy tripod will potentially shake in the wind and can
cause unsharp images, especially if extended fully as this is always the
time a tripod is at it's weakest.
Touching the camera during the exposure should be avoided. A Remote
Shutter or Cable Release will improve image sharpness by preventing the
camera moving during the start or end of an exposure. If you don't have
this functionality then try to use the self timer to minimise touching
the camera.
 |
|
 |
|
The flare in this image has ruined it.
It could have been avoided by better lens choice, possibly by using
a lens hood, or possibly by using a 'cutter' (a piece of card) held
in such a way so as to shade the lens itself. In some cases the only
solution is a slight change in camera position or composition. |
|
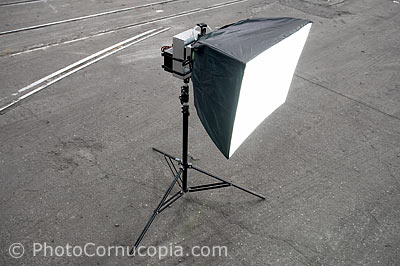
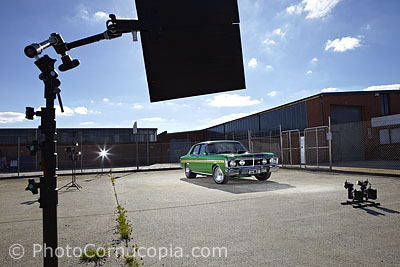
A cutter
is shown in use in daylight. In this case it is shielding the lens
whilst shooting towards the sun. The same principal applies when
shooting into bright lights at night and can be useful to shield a
lens from stray light. |
If you normally use a protective filter on your lenses then this is
probably a good time to remove them, regardless of the quality of the
filter. Painting with light involves pointing a light source into the
lens so any additional glass surfaces, such as those on any filter, will
increase the likelihood of flare, including veiling flare which reduces
contrast. Removing any unnecessary filters reduces the potential for
flare to ruin an image. Remember to put them back on when finished as
filters can certainly be useful aids in protecting your lenses.
Cameras and Lenses
You can use any camera or lens that you want but at a minimum you have
to be able to manually set the cameras aperture, shutter speed and
focus. You can not use a cameras auto settings when painting with light.
A camera that allows you to shoot RAW files will allow you much greater
flexibility than one that only shoots Jpegs. Do not shoot Jpegs (only)
if you have the option to shoot RAW files. RAW files allow dramatically
better control over white balance and almost all other settings during
post processing.
Ideally the camera should have a B (Bulb) setting which allows you to
open the shutter and keep it open as long as you want. Most cameras have
a maximum shutter speed of around 30 seconds which might be enough if a
B setting is not available.
The camera should preferably have a remote shutter or cable release
facility so that the shutter can be opened and closed without actually
touching (and moving) the camera.
You might not have much choice regarding which lens you use but if you
do then try to use a modern lens with good quality multicoating to
minimise the image degradation that can be caused by flare. Older lenses
often have mediocre or even poor coatings so can suffer significant
flare, especially if light sources are in the background, or even from
the light painting light source itself. A very fast lens, ie. F1.4 or
similar, is not needed as often a lens will be stopped down to around
F5.6-F11 for the exposure. However a relatively fast lens, eg. F2.8, can
be useful for focusing in dark conditions. Lens hoods should be
used whenever possible to minimise the chance of flare. A 'cutter',
which is simply a piece of dark coloured card or thin board, can be used
to shield the lens from stray light that is striking it directly.
Camera and Lens Settings, a starting point
The exact settings that you will need will depend on your specific
circumstances and on the effect you are trying to achieve.
A cameras ISO, aperture and shutter speed are all linked and determine
the actual exposure. You can alter the combinations of ISO, shutter
speed and aperture to achieve the same exposure but there is always a
trade off of some kind. When painting with light there is a balancing
act between the ambient light, the intensity of the light sources being
used, the time you need to actually paint with light and the technical
constraints of using poor ISO or aperture settings.
As a starting point, try to use the cameras lowest ISO setting that you
can. This will give you the highest image quality (both image sharpness
and dynamic range are best at the lowest ISO) with minimum noise. If you
are forced to use a very high ISO then you will have a higher level of
noise in the images which can be detrimental in many ways, typically
reducing sharpness and dynamic range.
The shutter speed you use will depend on many factors, ie ambient light
levels, aperture and ISO. Painting with light requires that you walk
around various parts of the car and this takes time. A shutter speed
that is very short, possibly only a few seconds, won't allow you the
time to paint the car with light, ie to light it. So you need to use a
long enough shutter speed that will enable you to paint with light. If
you intend to combine multiple images then maybe you only need to light
small parts of the car in each image and then combine them.
Alternatively you might need enough time to walk around the entire car,
possibly a minute or two (or even several minutes). A 30 second exposure
is often a comfortable staring point which allows enough time to light
two sides of a car but a 60 second exposure is often needed to be able
to walk around the entire care. Another way of increasing the intensity
of your light source is to simply walk slower, ie to light the car for
longer, so a very long exposure might be used to make your light source
brighter.
The aperture that you use will affect image quality in several ways
however as a starting point an aperture in the range of F5.6 to about
F11 will be a good staring point. An aperture in this range will offer
substantial depth of field (ie more of the subject will be sharply
focused) and most lenses perform better in this range than they do wide
open. You can use any aperture you like depending on the effect you want
to achieve.
How do you focus in the dark?
Use Manual Focus. Do not use Auto Focus at night.
The easiest way to focus at night is to use Live View or a similar
focusing aid on the camera whilst a light source is pointed on the car
itself, or held very close to it. In a typical front/rear three quarter
shot (ie most front/rear car shots) it is best to focus on the tyre
closest to the camera. Bring the light close to the tyre to focus, focus
manually (Auto focus probably won't work anyway), then do not change the
focus unless you accidentally move the camera or lens. As long as you
are using an aperture of around F8 (depending on the camera and lens)
then you will probably have enough depth of field for the entire car to
be in focus from front to rear.
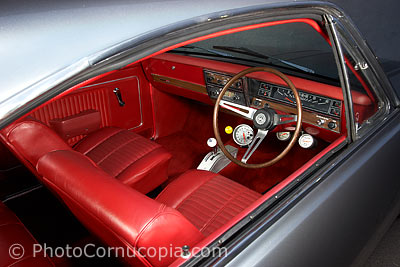
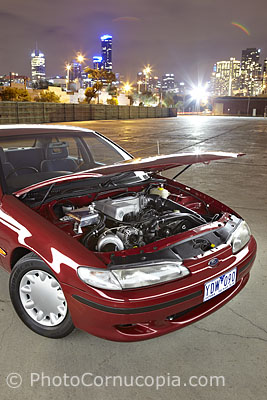
Further examples
The Light Painting technique can be applied to many lighting
problems and is particularly useful for lighting interiors, engine
bays and details at night or in dark environments.